 A Crust for All of Your Pies & Tarts
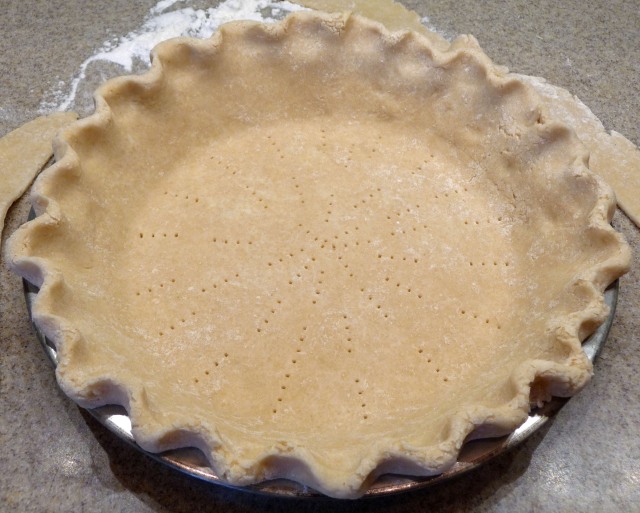
As promised, here’s the recipe for a tender, light, flaky and mostly whole-wheat crust for all of your pies and tarts throughout the year. Made from both unbleached white and whole wheat pastry flours for a richer flavor, this crust is easy to prepare in a food processor, stand mixer or by hand. Because of its high butter content, be sure to use cold butter, work quickly in a cool kitchen and chill the dough before rolling it out. Today’s post focuses on a fluted-edge bottom crust—perfect for Pumpkin Pie. For more options see pages 76-81 in my book Fruit-Sweet & Sugar-Free.
 Basic Pie Crust
This recipe is for one crust. To have extra dough for cutting out leaves and/or other decorations, prepare an additional quarter recipe. For a double crust pie double the recipe. Directions are given below for preparing the crust by hand, in a food processor and with a stand mixer.
Makes one pie crust Printer-Friendly Recipe
Ingredients
2/3 cup whole wheat pastry flour
1/3 cup unbleached white flour
1/8 teaspoon salt
½ cup (1/4 pound) cold butter
¼ cup cold water
Preparation
- Cut the cold butter into ½ inch pieces. Place it along with the flour and salt
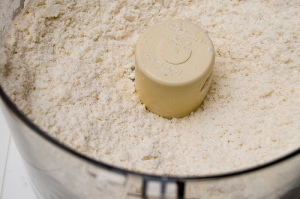 into the bowl of your food processor or stand mixer. Use the pulse action on the food processor to cut the butter into the flour until it resembles very coarse cornmeal. Or have the mixer on its lowest speed to do the same. It is important with either machine not to over mix and form large clumps of dough.
 - Add the water all at once and mix for a few seconds in the processor; and just until the dough comes together with the mixer, perhaps 10 seconds. With the processor, pinch some of the mixture, if it sticks together, then dump it into a medium-size bowl and press it into a ball. Otherwise first add another tablespoon or two of water and process for another couple of seconds before forming it into a ball.
- When mixing by hand, use the fingers and thumb of each hand to “rub” in the butter until the mixture resembles very coarse cornmeal. Be sure to lift your hands out of the bowl while simultaneously using your thumbs to rub the flour and butter across your fingers. Pour the cold water into the center of the flour mixture and mix quickly with your hand to form a ball of dough.
- With each method, wrap the dough in plastic wrap. Place in the fridge for about 20 minutes (and up to a few days) before rolling out.
Rolling Out the Dough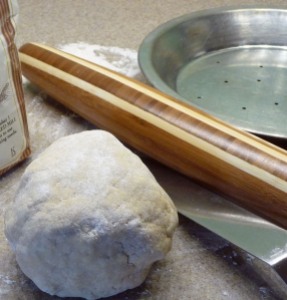
- The dough should be just soft to the touch. Lightly flour your counter top, your hands and your rolling pin. Flatten the ball of dough into a cylinder about 1 inch high. If the dough is hard, you can pound it a few times with your rolling pin to soften it.
- Begin each roll across the pastry ½ inch in from the edge closest to you and end each roll ½ inch in from the edge farthest from you.
- Roll the pastry out quickly using even pressure.
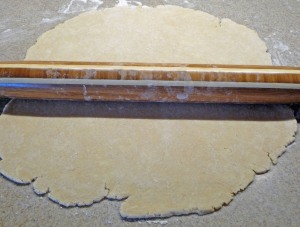 Slide a long-bladed off-set spatula under the dough after each couple of rolls to keep it from sticking to the counter. Turn the dough over (lightly flouring the counter if there is any sign of sticking) and rotate it 45 degrees. Roll again in one direction only. Continue until you have rolled your pastry into 12-inch squarish-circle about 1/8th-inch thick for a fluted bottom crust for a 9-inch, deep pie pan.
Transfer the Crust to the Pie Pan
Transfer the pastry to the pie pan by placing it over the rolling pin and then unrolling it centered over the pan. With lightly floured fingers gently ease the pastry into place, being especially careful to push it into the inside corners. Trim the pastry so that it extends ¾ of an inch beyond the edge of the pie pan.
To Flute the Crust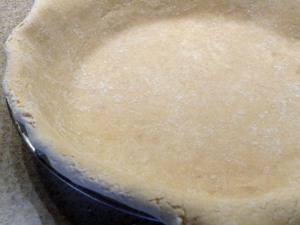
Turn the extra pastry under itself to build up the edge of the pie. Flute the edge by placing the tip or knuckle of the index finger of your right hand on the inside of the edge, and the tips or knuckles of the index finger and middle finger of your left hand on the outside of the edge on either side of the right finger. Push the dough into a “U” shape and continue around the pie.
Partially Baking the Crust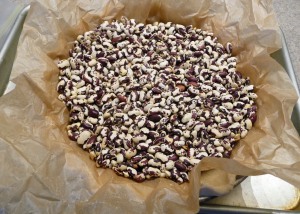
The best way to avoid a soggy bottom crust, especially with a custard filling, is to partially bake the crust before filling it.
Use the tines of a fork to prick the bottom of the crust. Crumple a piece of baking paper to “soften” it and place it on top of the crust. Fill with uncooked beans, rice or purchased aluminum pie weights.
Bake the crust in a preheated 350 degree oven for 20 minutes. Remove the paper, saving the weights to use many times over. Then fill the partially baked pie shell and bake according to your recipe.
Leaves and Other Pastry Decorations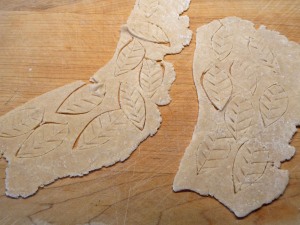
It’s fun and easy to cut decorations out of your extra pastry. Roll it out thinner than for pie crust. Use your favorite cookie cutters, or cut out small oval shapes for leaves. Bake on a separate baking sheet till golden brown.

6 thoughts on “A Buttery, Whole-Wheat Pie Crust”
Comments are closed.